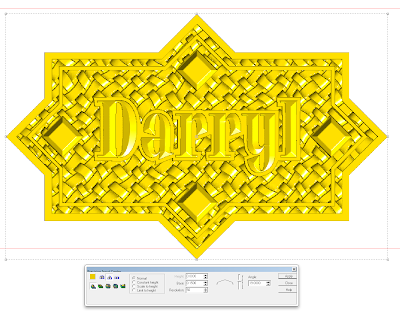
For Darryl I decided to do something a little more formal. As I played around in my sketchbook I decided I liked to play diamonds against share shapes. The vectors came together quickly. The offset tool came in handy for the border work as well as around the letters.
A simple flat relief was the first step, followed by modifying the basic relief by dropping down the center, leaving a thin pinstripe border.
Next I imported a wiggly weave bitmap from the TEXTURE MAGIC collection. It was applied to the base relief using the same vectors as the borders to create a mask.
the lettering outline was the next step, created as a new relief. Height wash
t critical as it will be floated into position before being merged with the base relief.
The diamonds were next. Since I wanted faceted edges I used the limit height command with the bevel tool. This would clip the top of the diamonds. Again they were created as individual reliefs so they could be floated into position before being merged with the base relief.
Here's a front view showing the height of the reliefs relative to each other. As I recall I nudged the diamonds down a bit as well as the lettering outline.
Merging highest with the base relief is the next step. The dialogue box takes you through the steps. Here I have selected the base relief... then push the blue arrow to go to the next step.
Then EnRoute asks you to select the reliefs you wish to merge. First select the merge highest button and then each relief you are adding. Once everything is select you can push the green check mark.
Then look at the various views to make sure everything did what it was supposed to, move or delete the reliefs you merged and no longer need. Then check once more.
The last step was to add the lettering by selecting the base relief and the lettering vectors before proceeding to modify the relief by adding the letters.
Then I tool pathed the file and sent it off too the MultiCam to be routed from a hunk of 30 lb Precision Board. Another name plaque is done.
-dan


