

During the Sculpting Magic Workshop I did up a wooly mammoth as my demonstration piece. It's been moved ten times since and so I decided he better get a proper mount and get hung on the wall before he gets damaged. I asked Hailey for an idea... what would be a good name for a business featuring this lovable creature. She came up with Wooly's Carpets. PERFECT!

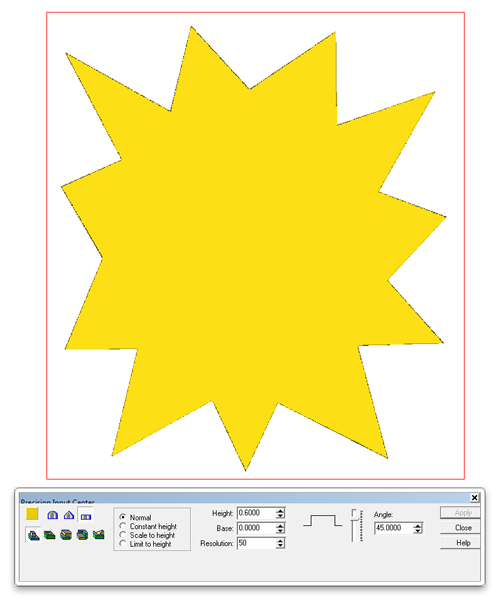
I wanted a font that was a little shaggy and it didn't take long to find one that looked fuzzy. I measured up the base oval to which I had built the mammoth and then started in on creating the vectors. I did the basic letter vectors around an oval in Illustrator, then imported them to EnRoute to finish building the files. I used the draw polygon tool to create the star. I started with 13 points but I would reduce this number later. I just wanted to start out with more than I needed so I could delete nodes instead of adding them.

I used the node edit tool to place the star around the oval. It reminded me of those cheesy adds we often see - perfect for this type of sign.

Then I went around the star one more time placing the points perfectly and reduced the point count to eleven. I also used the offset tool to put a border around the lettering.

The first relief was a flat star.
I then used a bitmap from my TETURE MAGIC collection to add some subtle texture.

The oval shaped donut was built as a separate relief using the dome tool. The inside was dropped down 0.3 inches leaving the letter border proud.

Then I Added a spaghetti texture to the inside of the donut using the lettering outline as a mask.

Once I was happy with the vertical placement I merged highest to form one relief.

The last step was to add the lettering using the dome tool. Now it was ready for tool pathing and then it was off to the MultiCam to be routed from a piece of 1.5" thick Precision Board.

I'll run the file tomorrow and then show how it went together. Stay tuned...
-dan