WELCOME!

It is hard to believe that it was almost ten years ago I witnessed a CNC router in action for the very first time. I was fascinated and simply had to have one! Although I had been in the creative end of the three dimensional sign business for most of my life I didn't really know what I would do with one of these machines - but I just knew it could do fantastic stuff.

Along with the CNC router I discovered the wonderful material called Precision Board and the glues, primers and other companion products they offer. Since then we have gone through many tons of the material using it in most signs and projects we tackle. This journal will chronicle our many adventures both past, present and future. I'll talk from the perspective of someone who pushes these products to the creative limit on a daily basis. I'll be adding to the stories two or three times each week. -dan

Monday, June 7, 2010

Fancy rope borders!

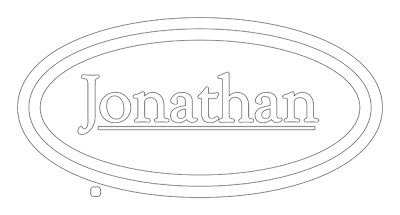
The next name plaque I tackled was for Jonathan. He owns a company that builds quality custom homes. Jonathan is excited about ways he can possibly use a router (and textures) in these homes. I suspect he'll fall in love with Precision Board too before the workshop is over. Each time I do a workshop at least one name plaque simply has to use the 'rope trick'. I never get tired of it. EnRoute makes it so simple! This is a simple extrude function with unlimited possibilities... one being a cool rope. The vectors were simple... some type with a series of oval around the lettering. The rope would follow the center oval.
Once I imported the AI vector file into EnRoute I added an outline around the lettering. I also added another oval offset slightly from the inside one to form the dome in the center. The small weird shape at the bottom is the cross section of the rope. A weave bitmap from my 'TEXTURE MAGIC' collection was used to create the texture. If you look close at the picture below you can see the vectors underneath the bitmap. I sized an positioned it so the weave was even on all sides.
The oval was extruded at a mesh, then positioned on the file before being merged to the relief. The mesh is red in the screen capture.
I created the border around the lettering as a separate file, then modified that relief using an oval to make it domed like the plaque itself. I could then position it using the different views to make sure it rose above the other parts perfectly. Once I was satisfied I then merged it all together. Tool pathing was done with a 3/8 ball nose to rough it out followed by a final pass with a 1/8" bit and an 80" overlap.
Then I sent it to the MultiCam for the magic treatment. In less than an hour the file was done. While the machine worked I was busy once more making another file for the next plaque...
-dan