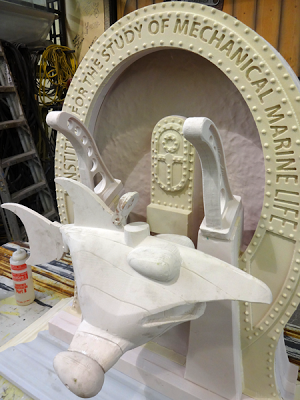
The mechanical fish needed some substantial hangers to look convincing. I decided some hefty I-beams were the order of the day but they needed to be a little fancy of course. Some swoopy curves and some drilled holes would do the trick nicely in a steampunk, victorian sort of fashion.
The files were created in EnRoute using the drawing tools. I first created the basic shape and then used the offset line tool to create what would become the flange of the beam. I wanted a solid piece at the top end to put an eye hook into. On the bottom end I created a thick mounting block. The rectangle around the beam is for sizing purposes. The angled line at the top will serve to cut off the inside hollow.
I used the jigsaw tool to create a new vector, then deleted the original inside line as well as the angles line.
I then modified this line using the point edit tool to add a curve to the top. Some circle vectors would form the cutouts when I created the reliefs.
The bottom block was then made into a relief one inch tall.
The I-beam flange was made into a 0.55" tall relief
Then I created a 0.2" tall relief of the inside web of the beam.
All these reliefs were then merged highest with a background zero height relief.
I made four copies of the beam shape, flipping two because it would take one of each to make a beam. The file was then ready for tool pathing. I did a rough pass using a 3/8" bit and a 0.1" offset. A final pass with a 1.8" ball nose bit finished things off nicely.
As quick as it took me to check my email and write one reply the MultiCam had done it's work. After cutting the columns to length and at the right angle I used a 5 minute epoxy to glue everything into place.
It's looking pretty spiffy already. There's still lots to do but the mechanical fish is coming along nicely.
Stay tuned for a brilliant development tomorrow...
-dan


