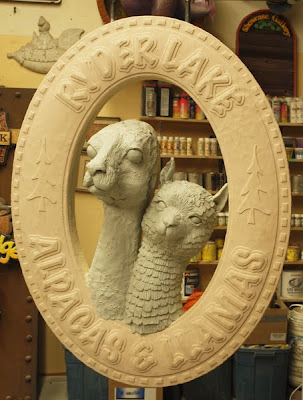
A dimensional sign to us is so much more than a flat piece of board with a creative hole blasted or routed into it. Shape means more than just the outline of a sign. I believe signs need to tell a story and so often the story just can't be told in a conventional way. This customer needed a sign and loved the signs we display put on the road. She wanted one like them for their farm. She came armed with a drawing her sister had done. Although basic, it was a good jumping off point. My client also came armed with good reference photos of the unusual animals.
 I created the vectors in Illustrator and then combined those shapes with the sketch my client had provided in Photoshop, adding in the textures, shading and bevels to give my client a pretty good idea of what the sign would look like when it was done. Once approved it was simply a matter of importing the vectors into EnRoute and then building the reliefs to create the routing files.
The top layer of the sign was routed from 1.5" 30 lb Precision Board. I then cut out two more layers of 1" Precision Board to laminate behind this to give me the depth and structural strength I needed to hold the sculpture. This was laminated up with a welded steel frame inside to give it strength complete with two bars sticking out of the top and one out of the side to weld to the pole and crossbar. I added a quick plasma cut steel tree to the top of the pole to mirror the tree image I used in the sign.

Once everything was secure I put the pole on a temporary stand and set to work on the sculpture. Precision Board scraps were used to build up the basic sculpture, then I roughed out a quick layer of epoxy sculpt to mock up the shape. The second coat would add in the detail.
It was looking pretty good in only a few hours of sculpting. Stay tuned for more progress next installment...
-dan


