WELCOME!

It is hard to believe that it was almost ten years ago I witnessed a CNC router in action for the very first time. I was fascinated and simply had to have one! Although I had been in the creative end of the three dimensional sign business for most of my life I didn't really know what I would do with one of these machines - but I just knew it could do fantastic stuff.

Along with the CNC router I discovered the wonderful material called Precision Board and the glues, primers and other companion products they offer. Since then we have gone through many tons of the material using it in most signs and projects we tackle. This journal will chronicle our many adventures both past, present and future. I'll talk from the perspective of someone who pushes these products to the creative limit on a daily basis. I'll be adding to the stories two or three times each week. -dan

Sunday, January 16, 2011

Sonbuilt 3D logo build part 3

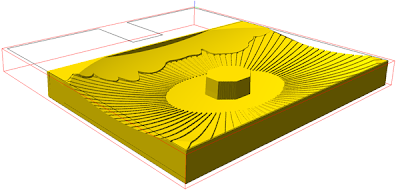
This morning when I took a look at the file the deep edge just over the clouds bothered me. Keeping it even with the top edge of the board used up a lot of valuable depth real estate, which I would need to create the waterfall. The depth of the cut would also be problematic as the bit I intended to use simply wasn't that long. I could do a maximum of 1.5" on that cut. It needed to be fixed. 

The solution was to crete the clouds as a separate relief, then dish it in using an oval vector ) as I had done with the starburst background.


Once I had floated the relief to the right height I them merged then together using the 'merge highest' command.


The end result was a file that could easily be handled with the bits I use. It was now ready to tool path and send to the router at last.

-dan